Every operating system these days enables the option to update automatically by default. It is necessary to download the latest updates to fix the bugs and the security flaws. However, some updates might cause certain apps to crash and therefore if you are a pro, it would be better if you wait for the reviews of every update before you update your machine.
Don’t miss: Why Dual Cameras in Smartphone?
This way, you can save your work from pending by preventing the app crashes. To do so, the knowledge to enable and disable the updates is essential. That’s why you are here right now. We know that.
You might also like: Signs when you should consider buying a new refrigerator
However, we are focusing only on Mac users now. Here in this post, we are going to guide you on how to enable and disable the automatic updates on Mac.
How to enable and disable the automatic updates on Mac?
- Select the Apple logo at the top left and go to System Preferences.
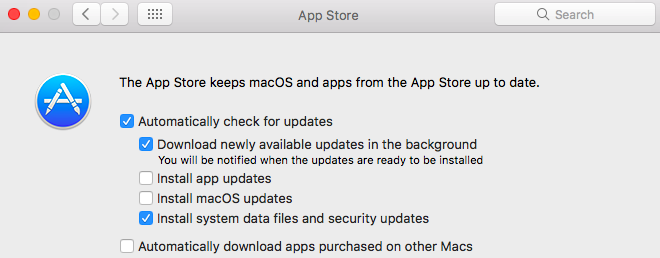
- Now select App Store. Here you will see a set of options that deal with the automatic updates on MacOS.

- The option (Automatically check for updates) to update is checked by default in all the machines. Uncheck it to disable the updates.
- To enable the automatic updates, check the option once again.
We hope this way works for you and help you from the app crashes. Let us know your reviews about this post in the comments section below.
For more Tutorials, visit our TUTEZONE section.


