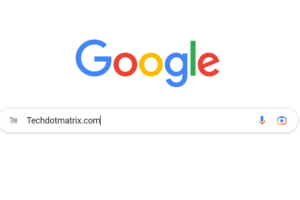
As we know Search Engine Optimization (SEO) is the most important factor to get organic visits. So, whenever we talk about SEO of WordPress blogs, the Robots.txt plays a major role in search engine ranking. Here in this post, we have provided the steps to create and update Robots.txt file for WordPress site. This will help you to bring your post on the first page of the search engine with proper optimization.
Before we proceed, you should have an account in Google Search Console for detailed steps. Read our how to add your WordPress website on Google Search Console post to know about it. Once, your account is ready you should upload the sitemap of your website, find the detailed Steps to create and submit your sitemap to Google.
The Robots.txt is a small text file saved at the root of your website which plays an important role in optimization of your website. It helps search engine bot to communicate with web crawlers. It informs search bot that which areas of the website should not be processed or scanned. But, you should be very careful in updating this file as the wrong configuration can block access to important part of your blog.
The sample for Robots.txt file is as below for any domain. You will have to replace the Sitemap URL with your website URL:
How to create robots.txt file?
SAMPLE
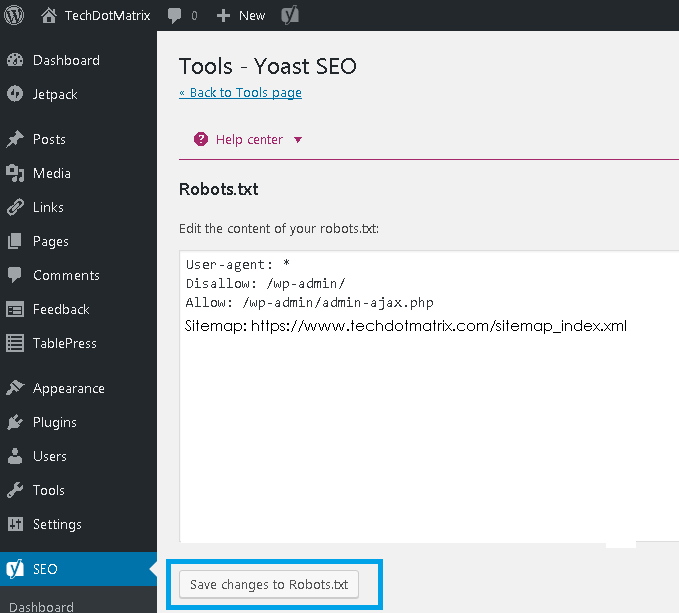
User-agent: *
Disallow: /wp-admin/
Allow: /wp-admin/admin-ajax.php
Sitemap: https://www.techdotmatrix.com/sitemap_index.xml
User-agent: *
It means every search bot will index your site. You can also specify the specific bot like User-agent: googlebot.
Disallow: /wp-admin/
It means the /wp-admin/ folder of the root directory is not allowed for indexing and thus search bot will not index this folder. The Disallow options restrict any search bot for indexing any page or folder. Most sites use no index in Archive folder or page for not making duplicate content.
Allow: /wp-admin/admin-ajax.php
It means although the /wp-admin/ folder of root directory is not allowed for indexing, search bot are allowed to index the ‘admin-ajax.php’ under this folder.
Steps to create and update robots.txt file for WordPress site
There are two ways you can update robots.txt.
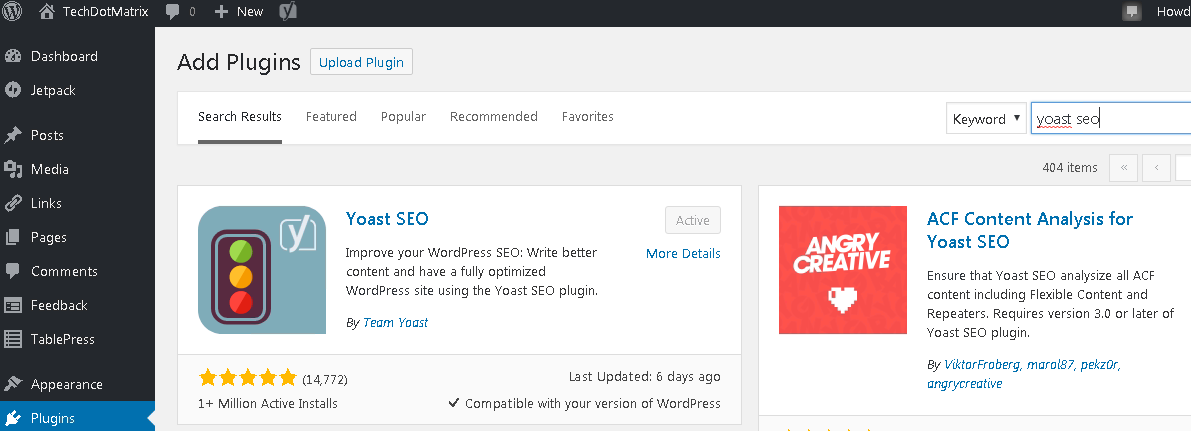
1. Update Robots.txt files using WordPress SEO by Yoast Plugin
Step 1: Login to your WordPress website, then Install and activate WordPress SEO by Yoast Plugin.
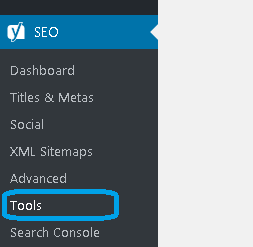
Step 2: On the left-hand side menu, click on the section ‘SEO’ and then click on Tools.
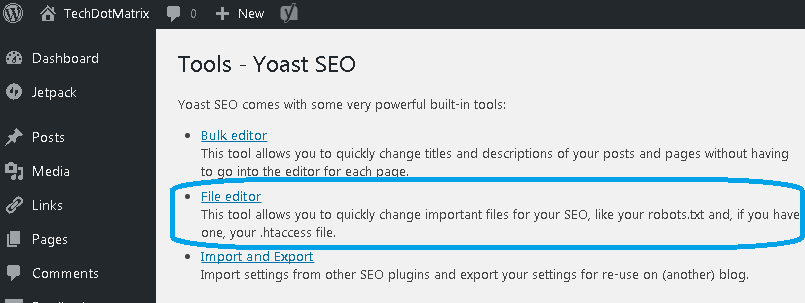
Step 3: On the right-hand side page, you need to click on link ‘File editor’.
Step 4: The ‘Robots.txt’ file will open for edit, do the required updates and click on the button ‘Save changes to Robots.txt’.
2. Update robots.txt file directly on the website server.
Step1: Use the text editor and create an empty text file, then save it with the name robots.txt after doing the required updates.
Step2: Upload the file to your server root.
Please contact your webhost for assistance if you have any trouble uploading or editing files on your server. It is recommended to edit the robots.txt directly on your server using FTP or a server file manager.
Once, you are done with creating and updating your Robots.txt file, it will appear in the Google Search Console in Crawl section at ‘robots.txt Tester’ link.
Don’t forget to subscribe to our e-mail newsletter to keep receiving more SEO tips. You might also like our BLOGGING section that contains exclusive articles how to improve the site performance and pull visitors to your website.