
All bloggers now know how to create a website or how to start a blog. But, trust me setting up a website is easy, while you are done with setting up your website and have started writing posts, that’s just the first step in the world of blogging as a Blogger. Second step is website optimization and add website to Google to get the benefits of SEO (Search Engine Optimization). Well there are several SEO marketing tools to help you with this. You can do that yourself by adding it to Google Search Console where you will have to submit URL to Google. The Search Console tool by the world’s largest search engines will help you to be found on the web and bring visitors to your site if they do Google site search for content available on your website, once you add website to Google search console. In this post we have provided the steps how to add a website to Google Search console.
First understand what Google Search Console is previously known as Google Webmaster Tools. The Google console is a free web service that’s offered by Google where you can submit your sitemap, check indexing status, lists internal and external links to your site, find keyword searches on Google for your site and many more. So, if you want to be found on the web, get support for your site or stay connected and updated with Google news, events and social media, this is the right tool for you. Now lets add web site to Google.
Steps to add website to Google Search console
Step 1. Go to Google Webmaster tools website and sign in with a Google account.

Step 2. After signing in, add your website’s URL and hit the ADD A PROPERTY button.

Step 3. On the next screen, you will be asked to verify the ownership of the website you are adding.
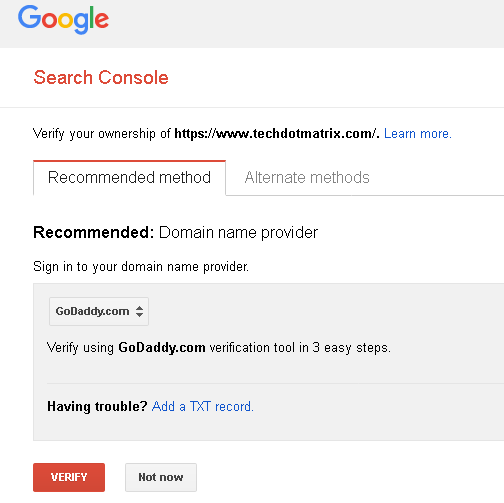
Step 4. Here you have two options ‘Recommended method’ and ‘Alternate methods’. The recommended method is through your webhosting and alternate methods have four options as visible in the screenshot below.
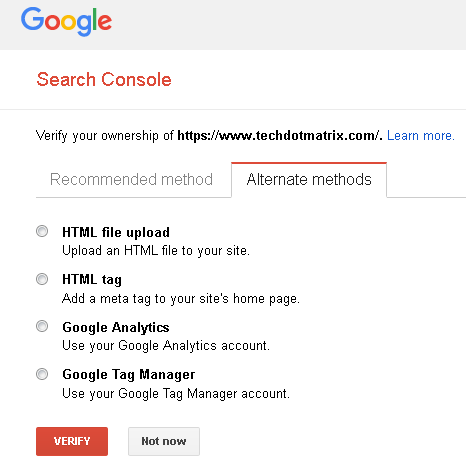
Step 5: You can either upload the HTML file to your website’s root directory using FTP or use your Google Analytics account to verify it or use your Google Tag Manager account. But, if you have the WordPress site the easiest way would be to obtain a Meta tag by selecting ‘HTML tag’ option and then adding it to your WordPress site.

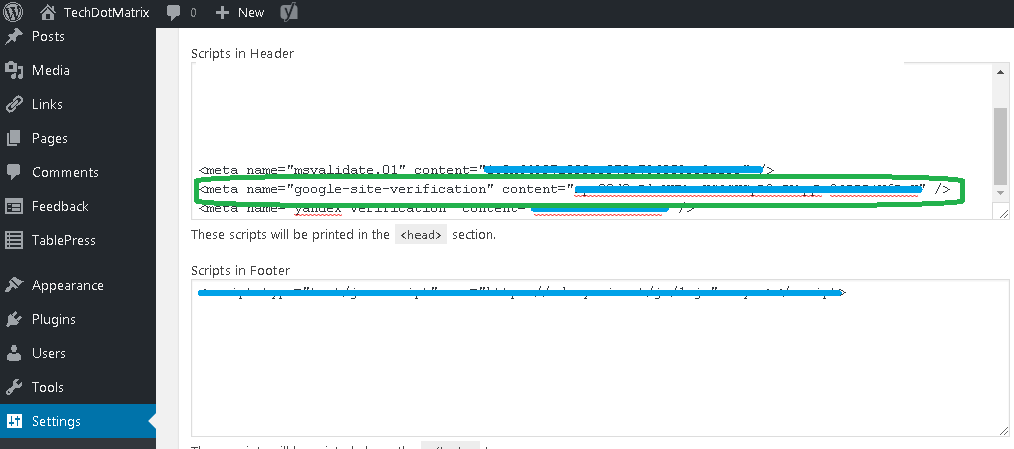
Step 6: To easily add the Meta tag to your website you can install Insert Headers and Footers plugin. Go to Settings — > Insert Headers and Footers and paste the Meta tag line into the Scripts in header field and click on Save. Then go to Google Webmaster tools website and click on VERIFY button.
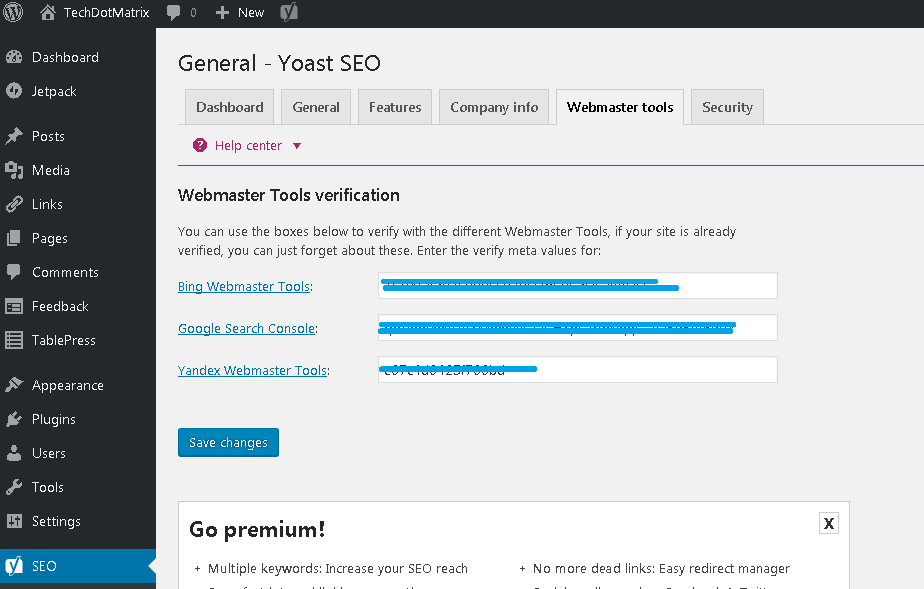
Or, alternately if you are using WordPress SEO plugin, you need to copy the verification key only i.e. in the content part of the Meta tag and paste it in WordPress SEO plugin. Click on SEO in your Admin sidebar, then click on the Webmaster tools tab and paste the unique key in the Google Search Console field and save it. Then go to Google Webmaster tools website and click on VERIFY button.
Step 7: Go back to Google Search Console website and click on VERIFY. Once it is verified, it will be ready for you to use all the available tools.
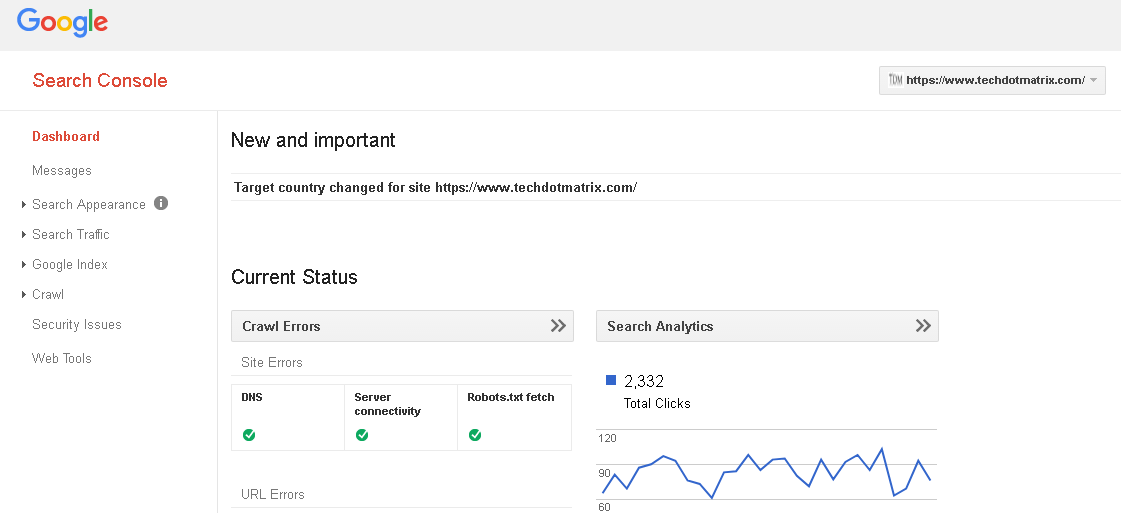
You will have to wait as it may take 2 – 3 days for your data to starts coming to explore all the options.
Once your data will be visible on the Google Search Console dashboard, the next step would be to upload the sitemap. You can refer our steps to create and submit sitemap on Google for the detailed steps. You can use Google Search console help option in case you have any query or concern. We would suggest always keep looking for the Google search console updates to get new ideas.
Let us know your thoughts about how to add website to Google search engine or you can say it is like to add URL to Google after Google sign in.
You might also like our BLOGGING section that contains exclusive articles and tutorials to be a successful blogger. Trust me, you will be glad that you paid a visit there.


