ISO is one of the important settings in a camera. In the beginning days of a photography life, almost everyone tends to go by the Auto settings of the camera which means that all the exposure settings are decided by the camera itself according to the lighting conditions. But, the day when you decide to take your photography to the next level by choosing to click the photos in manual mode, the ISO is probably the first settings that are going to adjust.
I have been clicking photographs for the past couple of years and I have often been asked about the importance of ISO in a camera. I am aiming beginners in this tutorial, that’s why I am going to use the simplest ways to define the ISO in this post.
Also read: What is Exposure?
What is ISO?
ISO determines how sensitive the Image Sensor in your camera is to the light. You have to mug up one thing now. Higher the ISO, more would be the light in your chosen frame with lot of grains, and lower the ISO, lesser the light in the frame with probably no grains at all.
You will have to go for higher ISO in indoor lighting conditions and the subject in your frame is not stationary. By doing so, you can choose a faster shutter speed to capture the moment.
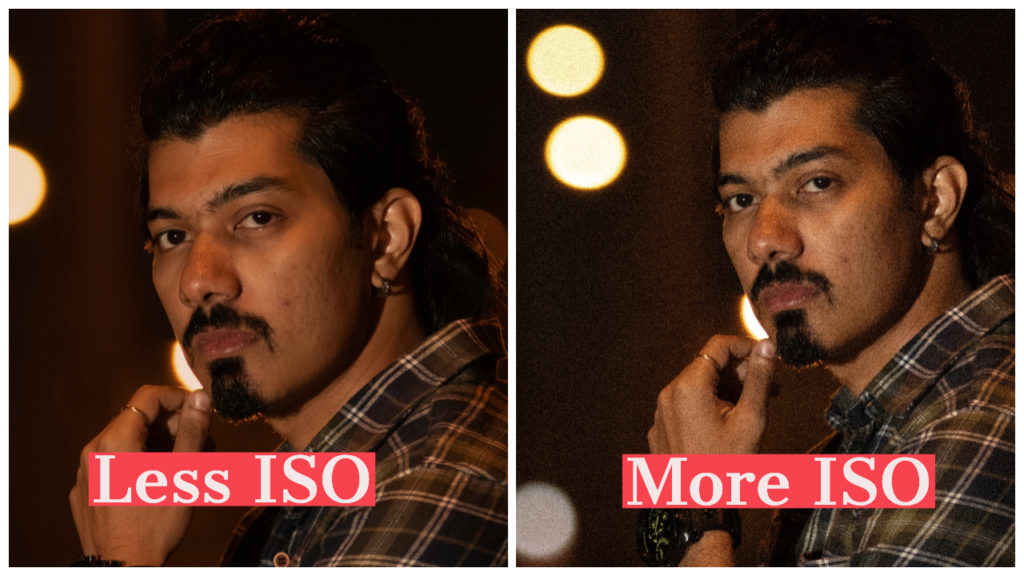
As mentioned above, when you’d select to go with higher ISO, chances are there for more grain to appear in your click. Let me show you the same here with an example below.

In most of the cases, people click the photos in ‘Auto Mode’ by letting the camera to choose the ISO according to the light conditions. But when you decide to tweak the ISO in manual mode, it also impacts the shutter speed and aperture and you will have to adjust them as well which thereby lets you master the Exposure in photography.
Following are the list of factors that you might need to consider.
- Light – Is there enough light?
- Moving/Stationary – Is my subject moving or at rest?
- Tripod – Is Tripod necessary?
- Grain – Do you need a normal shot or grainy one?
In cases where there is
In darker light conditions, if i still want less grain by choosing a low ISO, I will then adjust the aperture and shutter speed accordingly with the help of my tripod for a well exposed shot. In such cases, the subject in my frame must be at rest. If my subject is at motion, I would then go for an external light to bring down the grain in the final output.
However, the best way to explore the ISO would be by experimenting with the feature itself and see how each setting is impacting your final output.
Did you like this post? Share your views in the comments section below.
Do you have any question regarding the ISO? Write down the same in the comments section and I will get back to you.
For more posts related to photography, stay tuned with our PHOTOGRAPHY section.


