Manufacturing printed circuit boards involves several steps, from designing to producing. Before the PCB goes into production, it is important to know if the board will work or if it will fail. Fortunately, there are several methods used to test the lifespan and quality of any PCB. Some manufacturers do in-house testing, while others contract it out to companies or individuals specializing in it.
1. In-Circuit Testing
As stated by a pcb manufacturing company, In-circuit testing is the most expensive option, but it is also the most effective. Once your PCB has gone through this type of inspection, you will know immediately whether the board will function or not. With in-circuit testing, fixed probes are arranged to match the PCB to check the solder of each connection. Then, the tester engages the probes with the circuits to see if they work. This is a time-consuming test, but it pays for itself in knowing where the flaws are on the board.
2. Automated Optical Inspection
Automated optical inspection or AOI involves using a 2D or 3D camera to take detailed photos to compare with the original plan of the PCB. If the photographs do not match the design, then production is stopped, and changes are made. This type of inspection should not be used on its own but paired with in-circuit testing or flying probe testing.
3. Flying Probe Testing
This type of test works well and is less expensive than in-circuit testing. To use a flying probe test, you do not need to power up the board. This type of test looks closely at several components like the opens, resistors, inductors, and shorts with probes and needles on an X-Y grid. If you do an in-circuit test, you do not need to do a flying probe test, too. Because you do not run the board during the flying probe test, you do not learn if the board works.
4. X-Ray Inspection
Like the automated optical inspection, the X-ray inspection is more of a visual inspection instead of a test of whether the board works or not. During this test, an X-ray tech looks for defects in the solder connections, internal traces, and other components. When PCBs have several layers, the only way to inspect the internal ones is by looking through an X-ray machine. Because this is a specialized test, it is expensive to run.
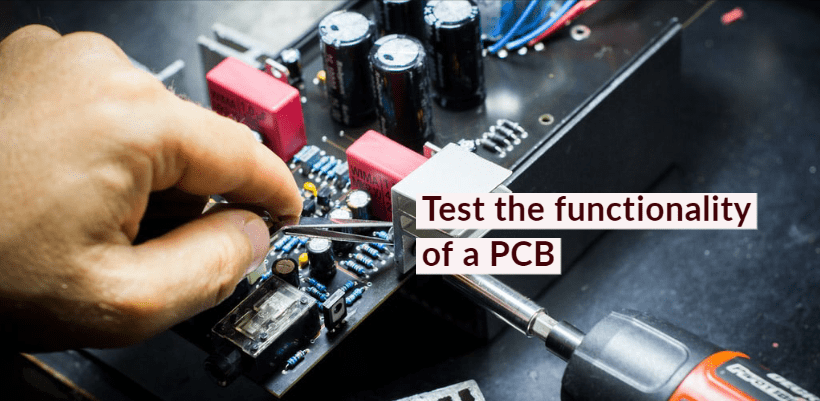
5. Functional Testing
One of the best tests for any PCB is a functional test that checks if the PCB runs. This test uses equipment to see if the circuit board works and if it meets the requirements set by the UL and other government agencies. This is another time-consuming test, so if you are in a hurry, this is not a realistic test to conduct.
When selling a product that needs a PCB, you must find out if the device is going to work. Paying for tests is less expensive than recalling products after they hit the market. Testing in advance will save your business’s reputation.
For other tutorials, visit our TUTEZONE section. You will be glad that you paid a visit there. Trust me. It’s worth visiting.